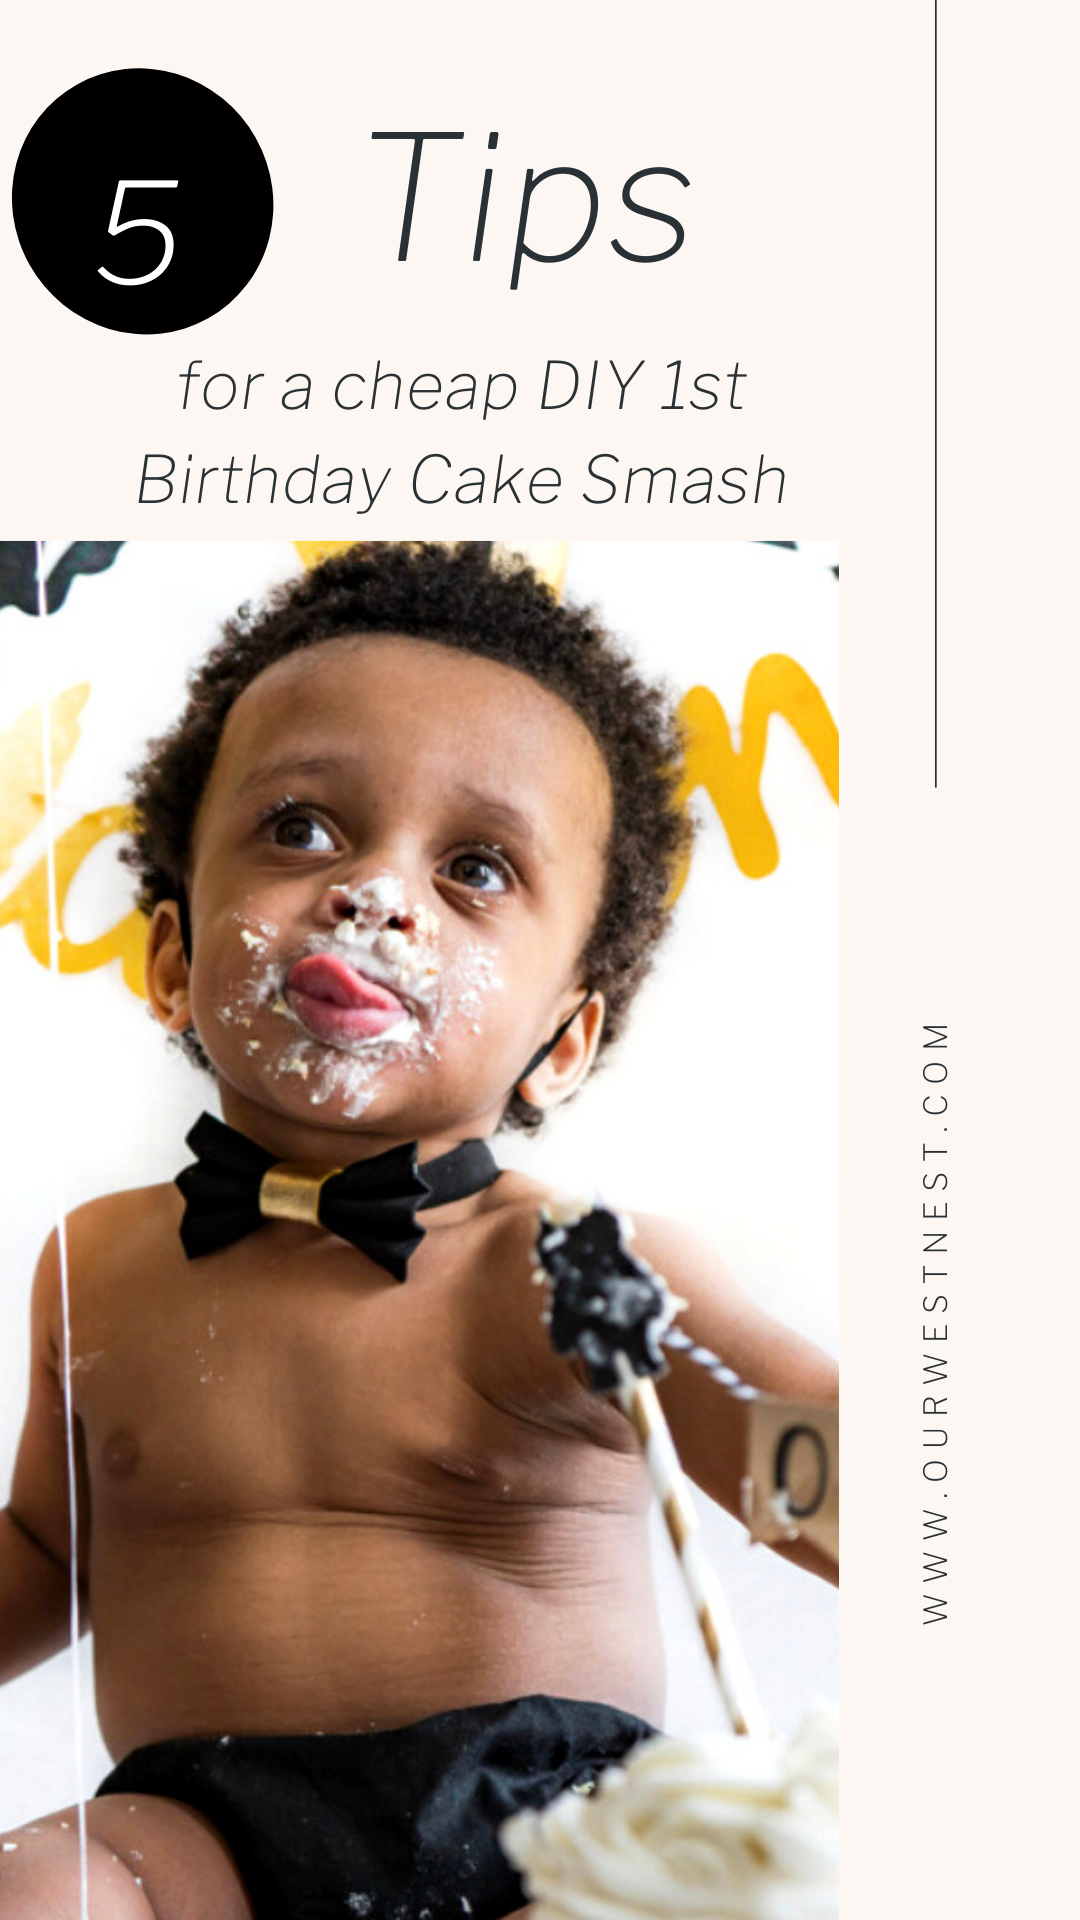
5 Tips for Cheap DIY 1st Birthday Cake Smash Photos

I can’t believe one whole year has come and gone and we made it to Little David’s 1st birthday! We had such a fun time doing his cake smash photos and I got so many compliments on his pictures and questions about how I put it together. While I’m all about having nice things and splurging when necessary, I also love to save a pretty penny anywhere I can. Luckily, I was able to do just that with Little David’s cake smash photos, and still keep it very nice and classy. I want to share with you my 5 tips to kill your baby’s cake smash, make it look great, and still do it on the cheap, cheap! I’ve also linked the items we used so you can easily click and shop to DIY and recreate this look for your little guy’s cake smash photos!
Heres are 5 steps you can follow to kill your baby’s smash cake photos!
1) Decide on a theme.
I suggest first picking a theme because you’ll need light decoration and will want your background to be cohesive. You can browse Pinterest for cute ideas. Little David is quite the wild little boy, he’s super rambunctious and just full of joy, so we went with a Wild One theme. I found a cute outfit on Amazon that I loved so I went with that. You can keep it really simple though and even score great finds at places like TJ Maxx! They often have the cutest little outfits for as little as $7.00
MOM PRO TIP #1: To make finding the colors/décor you want a super easy task, browse the isles at your local Party City to find common party themes and/or colors so that you can easily find what you may need.
2) Gather your items.
Basic things you’ll need include for your cake smash photos:
Something to serve as your backdrop
Décor to hang on the back of your backdrop
Items to place onto the floor of your backdrop
A cake for smashing
A cake topper (optional)
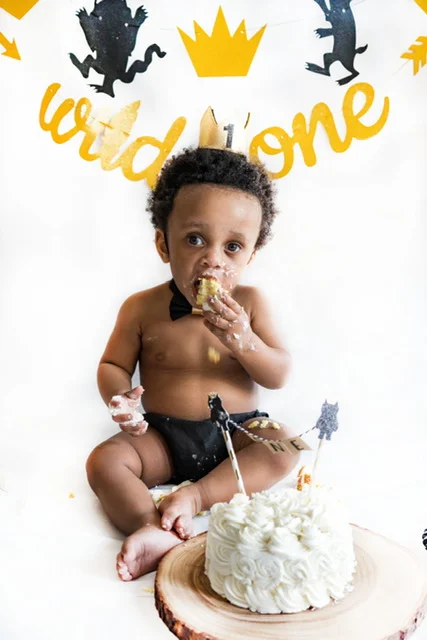
I chose to use a white linen-like, paper table cloth as my back drop. For décor, I picked up two packs of fans - large gold ones as well as small black ones since our color scheme was black and gold. I also bought a few balloons. I also found a Wild One Banner that I loved. When it comes to a cake, you can easily make a one layer cake yourself and decorate it. I chose to purchase a basic vanilla mini cake from Publix, but wanted it customized with buttercream rosette decoration, and it was less than $15.
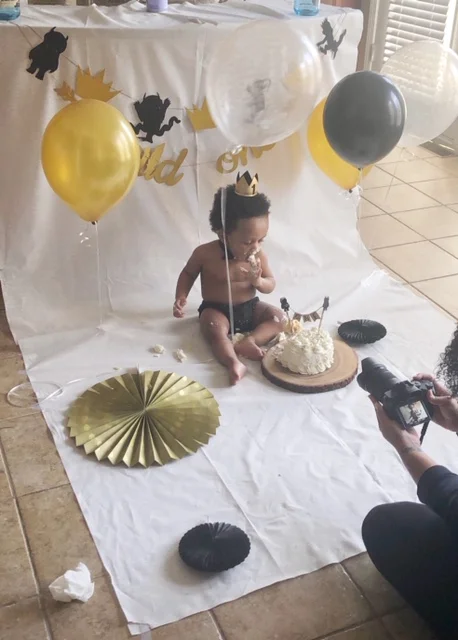
Little David finally digging into his cake, on our kitchen floor, for his cake smash photos.
3) Hang your backdrop where there is great natural lighting.
Natural light is important when shooting your photos. If you’ve got great lighting, you’ve already won half the battle. Great light will give your cake smash photos a vibrant brightness that will bring your pictures to life! For us, our kitchen sits in a great naturally lighted area, and this is where we hung our backdrop. I hung the table cloth purchased from Party City right over the island in my kitchen. I laid it the long way from the top of the counter on the island, and let it drape over the edge, allowing it to create a natural backdrop look. I used the magic tape at the house to secure ends to the counter top of the island.
4) Decorate your backdrop.
Next, you’ll want to strategically decorate your backdrop, keeping your baby’s height in mind. Since your little will be sitting in the middle, make sure you place things in a way that makes sense according to the space. For example, we had balloons so I cut the ribbon so each balloon wouldn’t stand too much taller than my son while he sat on the floor. I taped the end of the ribbon holding each balloon to the table cloth back drop. I also placed a few decorative fans, of various sizes, in close proximity. Lastly, I hung the Wild One banner to the back of the back drop.
MOM PRO TIP #2: Get creative with cropping each photo as you take it. Remember, you want this to look like you’re in a studio!

5) Have fun!
We really had a fun time while shooting Little David’s cake smash photos. We didn’t worry about the mess he would make at all because we knew soap and water could clean up the mess, but nothing could take the place of our memories from his first cake smash. It took a while for Little David to really get into it, and he had an awkward look on his face, probably wondering why he was allowed to dig into a whole cake without anyone telling him “No!” LOL! After his dad smashed a little in his face, he got right on board! We thoroughly enjoyed playing with him, helping him dig into his cake, and making memories that will last a lifetime!


This was my first time doing cake smash photos, but I thoroughly enjoyed it! All in all, I spent about $50 on everything, not including our photographer. Keep in mind though, a professional photographer is not a requirement. If you have a great camera at home, or even an up to date smart phone and exceptional lighting, you can work wonders!
Please DIY and recreate these cute cake smash photos for your little boy! Remember to tag me in your photos and or stories on Instagram so I can see. I can’t wait to see what you put together!
Have you, or do you plan on taking cake smash photos for your little’s first birthday? Let me know your experiences and thoughts below!
XOXO,
Onteria
SHOP THE POST

For more cake smash tips, party themes, and other goodies, follow me on Pinterest here! If you love te cuteness of these cake smash photos share this post with your friends and family by PINNING it!